Build an advanced filter
Use these instructions for building advanced filters while working with standard reports and claim tracking.
To build a new advanced filter:
-
Click Build Filter, as shown in the following example.

Example shows Advanced Parameters section in the New tab in Reporting
The Advanced Filters window opens.
-
In the Query Name field in the upper left corner of the window, type a name for the filter. Use a concise, yet descriptive name so that you can easily identify the filter later.
NOTE: After saving a filter, you cannot view its makeup until you view a report with that filter applied. To view applied filters, click the Applied Filters button while viewing the report. Descriptive naming helps remove guessing which filters will be returned when you make a selection.
TIP: Since using advanced filters lets you select claims using a large number of criteria, it is best to know exactly what you want. Identify the criteria to use on this filter before assigning them.
-
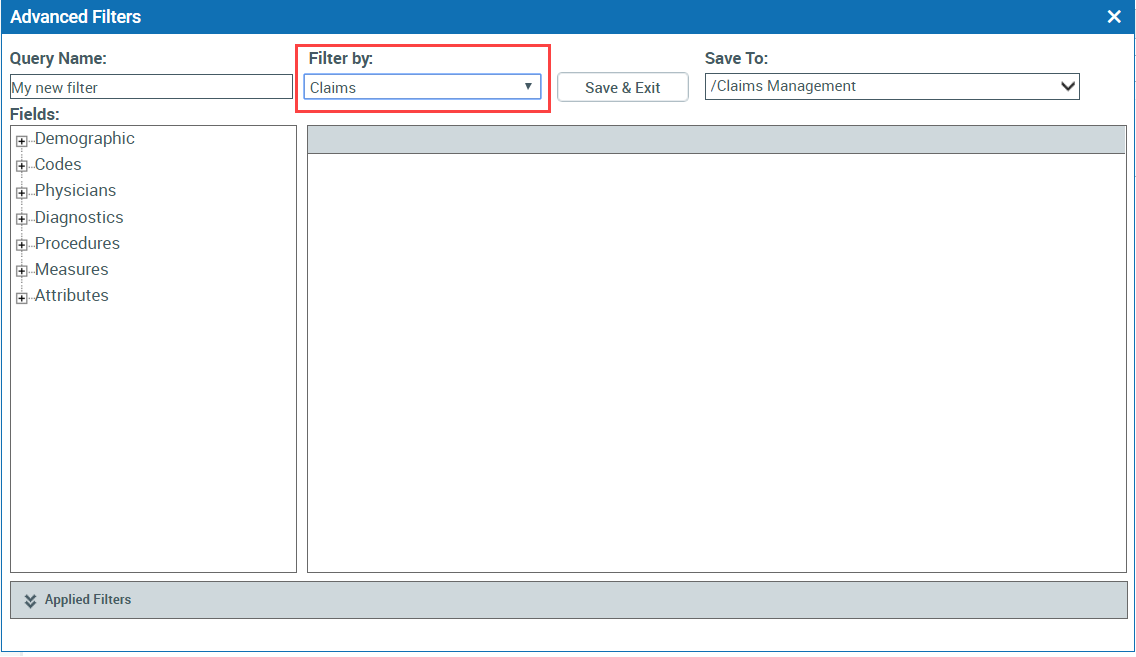
In the Filter by drop-down, select one of the following:
- Claims – Select this to filter by whole claim
-
Line Items – Select this to filter on specific line items.
The following example shows claims selected in the Filter by option.
-
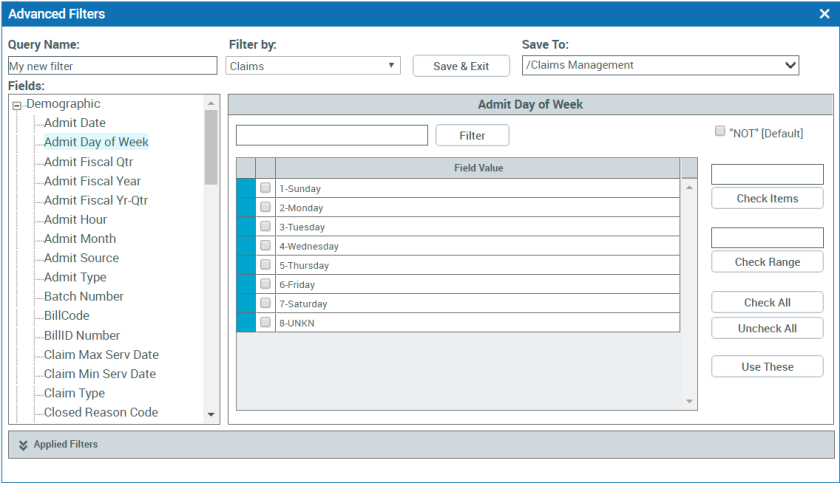
In the Fields section, expand the filter fields as needed by clicking the plus symbol (+) to the left of each category to see every possible filtering option.
- From within the expanded field, click a desired criterion.
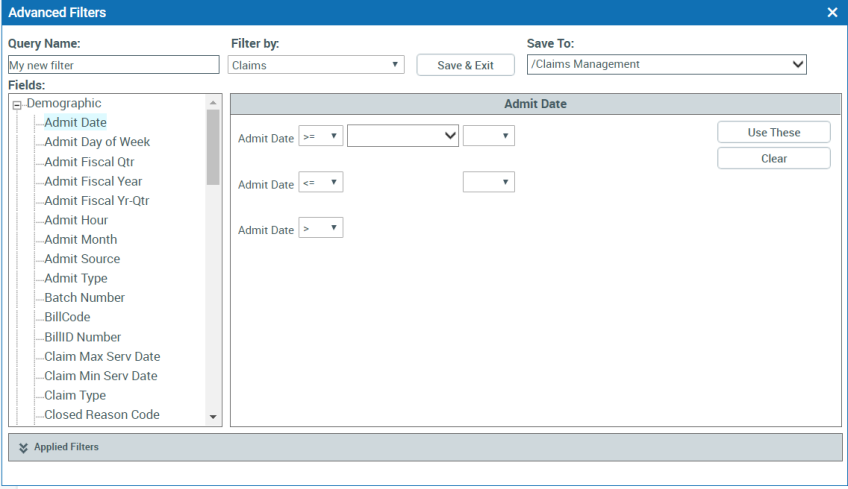
Depending on the criterion selected, the page displays either an option bank or a drop-down menu, as shown in the following examples.
 Option bank
Option banks allow you to select from all records of that type in the database, as in the following example:
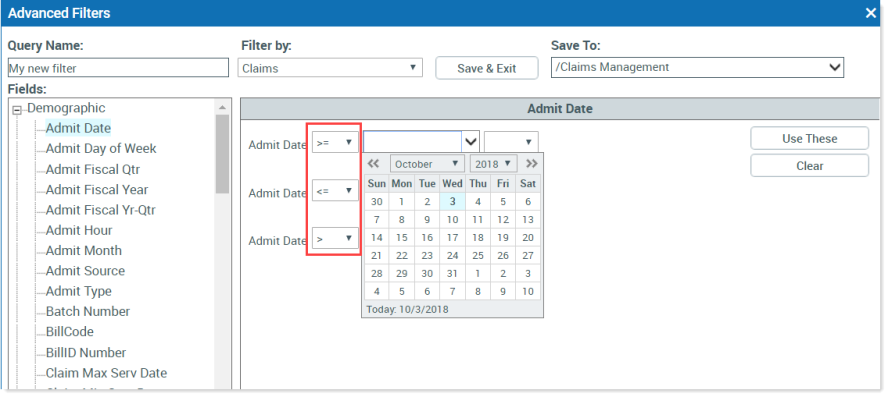
Drop-Down parametersDrop-down menu containing parameters to set (four inequality signs and an equal sign).
-
Select options or parameters, as appropriate:
- If presented with an option bank, click the check box to the left of each item to include that item in the filter.
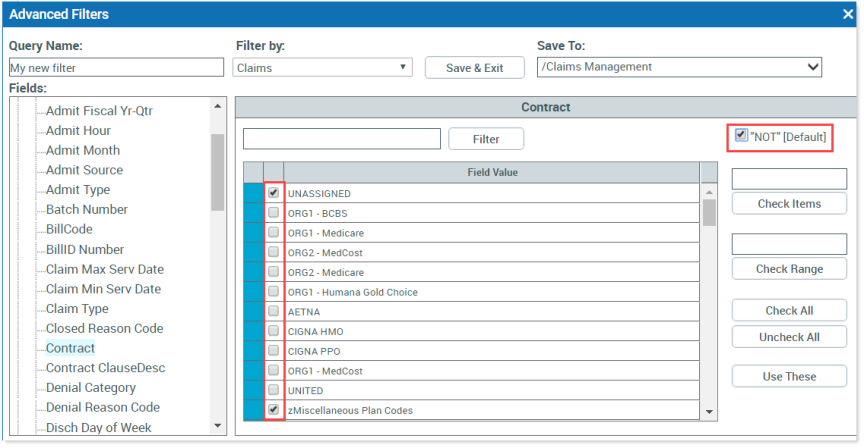
- If the selection list is long and consists of numbers, you can filter to the data range rather than scrolling through the list. Type the number range into the Check Range field and then click Check Range.
To select the majority of the options and exclude only a few choices, select the “NOT” [Default] box and then select the ones to exclude, as shown in the following example.
-
If presented with parameters to set, as shown in the following example, select the direction of the equality/inequality, and then from the drop-down menu, select the value on which the inequality is based.
-
Selecting AND/OR allows for another set of parameters on the following line.
More complex filters contain a few different sub-filters, such as Discharge Date, Latest Payment Date, and Total Expected Payments.
- To build a complex filter, repeat Steps 5 and 6 as necessary to add multiple filter selections.
- If presented with an option bank, click the check box to the left of each item to include that item in the filter.
-
After making selections, click the Use These button to the right.
NOTE: More complex filters may add time to report processing. Also, discharge date and contract are already part of your basic report parameters. No additional filtering is needed unless you require a specific payer code or you are building a filter for Claim Tracking.
-
To verify all filters were properly selected, in the bottom left corner of the Advanced Filters window, click the Applied Filters drop-down. Expand the selection to see all filters chosen. If any are missing, repeat Steps 5 and 6 and 7.
-
When finished adding criteria, click Save & Exit.
